When the warm, summer months draw to a close, your above ground swimming pool probably won’t get as much use during winter, if any at all.
That means it’s time to know how to winterize your above ground pool to prepare it for the cold season and make sure it’s ready to go again when the next summer comes around!
This process of winterizing your above ground swimming pool is all about leaving yourself with as little work as possible when it comes to reopening your pool. Sure, when the weather’s nice it’s easy to perform regular maintenance on your pool and take a quick dip to reward yourself.
However, when it gets colder, you don’t want to be outside every day skimming leaves and insects off the surface and not even get to enjoy the clean pool when you’re done.
In this article, we’ll go over just why it’s so important to winterize your pool and explain what can happen if it’s not done properly. We’ll also outline all the important steps you need to take to make sure you can enjoy swimming and splashing around next summer!
What Happens If I Don’t Winterize My Above Ground Pool?
So, we’ve established that it’s important to winterize an above ground pool to keep it safe during the cold months and prepare it for the next summer. But what are the things that can go wrong if this winterization process isn’t done properly?
Pipe Damage
Pool pipes and lines are essential for keeping the water level in your pool at the right point and for ensuring that the water is safe to swim in.
During winter, you won’t be running water through the pipes as often, maintaining a steady and consistent water flow.
The water that gets left in the pipes can freeze, expand and burst the pipe and lines to your pool, causing some costly repairs to have to be made.
Algae Infestations
You may have seen what some pools look like if they get left unused for a long period of time. The chlorine in the water stops doing its job and the beautiful blue water will turn a goopy green color instead.
Algae can grow really easily on still water without any chemicals to fight them off. This algae then encourages dangerous bacteria to join the pool party, making the water dangerous to swim in again.
Filter Damage
Most pool filters aren’t designed to withstand the freezing cold temperatures of winter, so if you leave them unused in the pool during these months, they’re likely to crack and stop working.
Similarly, if ice builds up on a pool filter, it will harden and expand, causing even greater damage to the filter.
When Should I Winterize My Above Ground Swimming Pool?
Believe it or not, you can actually do some damage to your pool by starting the winterizing process too early, as well as if you do it too late. This is because algae, like any other living organism, needs heat to survive and grow.
If your pool water is still too warm, even when you winterize it, the algae could still be able to seep into your water and grow over the cold months when you’re not using it.
The best time to winterize your pool is when the temperature around the pool drops below 65°F (18°C).
Don’t worry if the temperature goes back up above this number, that’s a good opportunity for you to test the water chemistry and check up on how well your winterization efforts are working.
9 Steps For Winterizing An Above Ground Pool
Now that we’ve got all the general information out of the way, here are all the steps you should take to ensure your above ground pool survives the winter:

1. Check The pH Balance Of Your Pool
This can seem like a daunting, scientific process but it’s actually a lot easier than you might think.
Digital pH testing kits are available at a variety of different online retailers and you shouldn’t find it too difficult to find one in a physical store either.
How To Check The pH Balance Of Your Pool Water:
- The first step you’ll need to take is ensuring your pH water tester kit is clean and doesn’t have any other liquids or pool water from a previous year left in it.
- Then, simply fill up the provided tube with as much of the pool water as the packaging recommends.
- Next, you’ll need to add whatever chemical reactive agent is provided in the kit to the pool water and shake it up to mix it thoroughly.
- The pool water will turn a different color and the pH testing kit will come with a handy color guide so you can tell exactly what pH level your water is at.
Once you’ve done all that and you have your pH reading, you can tell if the water is too acidic or too alkaline. The pH of your pool water should be between 7.2 and 7.6 according to the chart.
How To Alter The pH Balance Of Your Pool:
- If the pH is lower than 7.2, it means it’s too acidic and you’ll need to add some bicarbonate of soda or any kind of specially designed pool alkalinity increaser. There are plenty of specially designed chemicals available online and in stores so just make sure you use one that will increase the water’s alkalinity.
- If the pH is higher than 7.6, it means the water is too basic and needs to have an acid added to it. Again, there are chemicals available online and in stores called ‘pH reducers’ that you can add to achieve a better pH balance.
2. Shocking Your Pool
This step involves adding even more chemicals to your pool water. I know it may seem like a lot at this point, but these chemicals are all designed to be safe to swim in, if used correctly.
You can buy chlorine shock chemicals in liquid or granular form online and in stores. There will be instructions on the packaging to indicate how much you should use depending on the size of your pool.
However, if your pool is already starting to look a little green or cloudy, you might want to add more of this chemical than the recommended guideline amount.
This step will help to remove any hidden bacteria in the water that could cause algae to grow over winter.
3. Clean Your Swimming Pool
This step is absolutely essential for ensuring the winterization process works properly. If there are any contaminants left in your pool over winter, it will completely ruin all the work you did adding chemicals to your water.
Brush down all the walls and floor of your pool thoroughly to remove any foreign contaminants that might be stuck to them.
Then, use a skimmer to remove all the loose debris, leaves, insects and anything else that might be floating on the surface of your water.
If you have access to a pool vacuum, this can help to speed up the process and make doubly sure that all the potential contaminants have been removed properly.
This is also something you can check for every now and then during winter, skimming off anything else that’s gotten into the water if you see something.
4. Remove And Clean All Accessories In Your Pool
Remember what we said earlier about drains and other pool equipment being damaged by cold weather? Well, this step is important for protecting your accessories from that cold damage, as well as keeping them safe from mold.
By accessories, we mean things like above ground pool ladders and steps, skimmer baskets, pool cleaners and solar blankets. These can all be cleaned and stored away in a dry place, out of direct sunlight.
5. Drain All Your Pool’s Equipment
Different types of pool will have different equipment to keep it working, so this step will vary depending on how much equipment you have in your pool.
By equipment, we mean things like drains, filters and salt water chlorinators. Of course, your pool might have more or less equipment than this, but the process is pretty much the same for all pool paraphernalia.
Most equipment will have a plug or cap that you can remove by twisting off or simply flipping open. This will allow the water to escape from the inside of the mechanism and prevent it from going moldy and growing algae inside.
We repeat, every pool will have different types and amounts of equipment. It will be pretty obvious how to drain most of them if the plugs and caps are on display, however you should look up how to drain your above ground swimming pool equipment online if you’re struggling with this step.

6. Disconnect And Store Your Lines
We mentioned earlier about how your lines can burst due to freezing water expanding inside them. This step will help to avoid that.
Simply disconnect any lines from the pool, drain all the water from inside them and make doubly sure they’re as dry as you can get them. You’re going to store them away for several months and you don’t want to come back to find them full of algae.
For extra protection, you can even add some pool antifreeze to the inside of your lines to prevent any leftover residue from causing them to crack.
7. Lower Water Level
This might not be a necessary step for every pool and will only need to be done if the water goes up close to the brim of your pool.
You can use any variety of equipment to do this, or simply use the lines, before you’ve disconnected them, to remove some of the water.
This step is done to help the walls and cover of your pool handle any expansions or movements caused by ice forming on the water. Naturally, the less water there is in the pool, the less of a strain it will put on the walls and cover.
8. Add Winterizing Chemicals
This step involves adding even more chemicals to your water but we promise this is the last time you’ll need to do that!
Again, there are plenty of different winter pool chemical sets you can buy in plenty of places online or in stores.
The packaging will indicate how much of the above ground pool chemicals you should use depending on the size of your pool and you should try and stick as close as possible to this guideline amount.
This is another step that ensures algae can’t grow in the pool water over winter and, if you don’t do it properly, you could be left with a lot of cleaning to do when you reopen your pool.
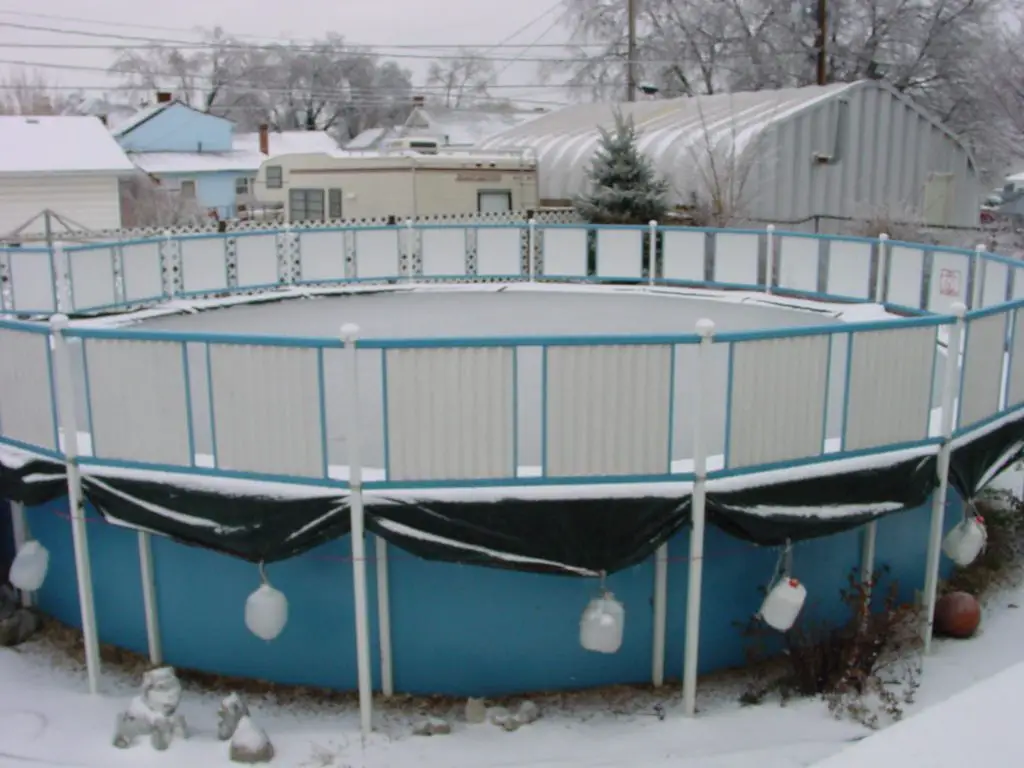
9. Cover Your Swimming Pool
This is the final step to ensuring your pool will be safe for the winter. If your pool doesn’t already have a cover, there are plenty you can find online and in certain stores.
The fit of the cover doesn’t have to be perfect, as long as it’s not too small and doesn’t cover the entire surface of the pool.
The cover will stop any foregin contaminants such as leaves and insects from getting into the water and providing a breeding ground for algae to grow.
It’s important to make sure the cover is tightly secured to the pool using clips or weights. Appropriate clips are easy to come by and a lot of covers will come with them included.
If you can’t find any clips or have simply lost yours, try to use something like water or sand bags rather than bricks or heavy stones. Anything that could fall into the water and damage the walls or floor of the pool should be avoided.

Final Thoughts On How To Winterize Your Above Ground Swimming Pool
Hopefully, you now know a lot more about how important it is to properly winterize your above ground pool. The steps we’ve outlined in this guide are specific to above ground pools but pretty similar to the steps you might take to winterize an in-ground pool.
Some things you should consider before starting this process are about preparing appropriately. For example, you should make sure you have all your chemicals ready to go when you start the process, as adding them at long intervals could negate the effects of each.
Similarly, make sure you have plenty of time to carry out the whole process before fully closing your pool.
Finally, make sure no one swims in your nicely winterized pool and ruins all the hard work you put in.
If you properly know how to winterize your above ground pool right, the happy days of splashing around in your pool with friends and family are just around the corner!

Hello, I am a writer and marketing specialist in Kansas City, MO. My love for swimming pools started as a child when I would visit my aunt & uncle’s inground swimming pool on a frequent basis over the summer. Since then I have taught swimming lessons at a Boy Scout Camp, participated in the full setup, installation and maintenance of my father’s inground swimming pool, as well as enjoyed constantly researching everything there is to know about swimming pools for 5+ years. I enjoy all water related sports, being part of the online swimming pool community and always learning new things!

Leave a Reply